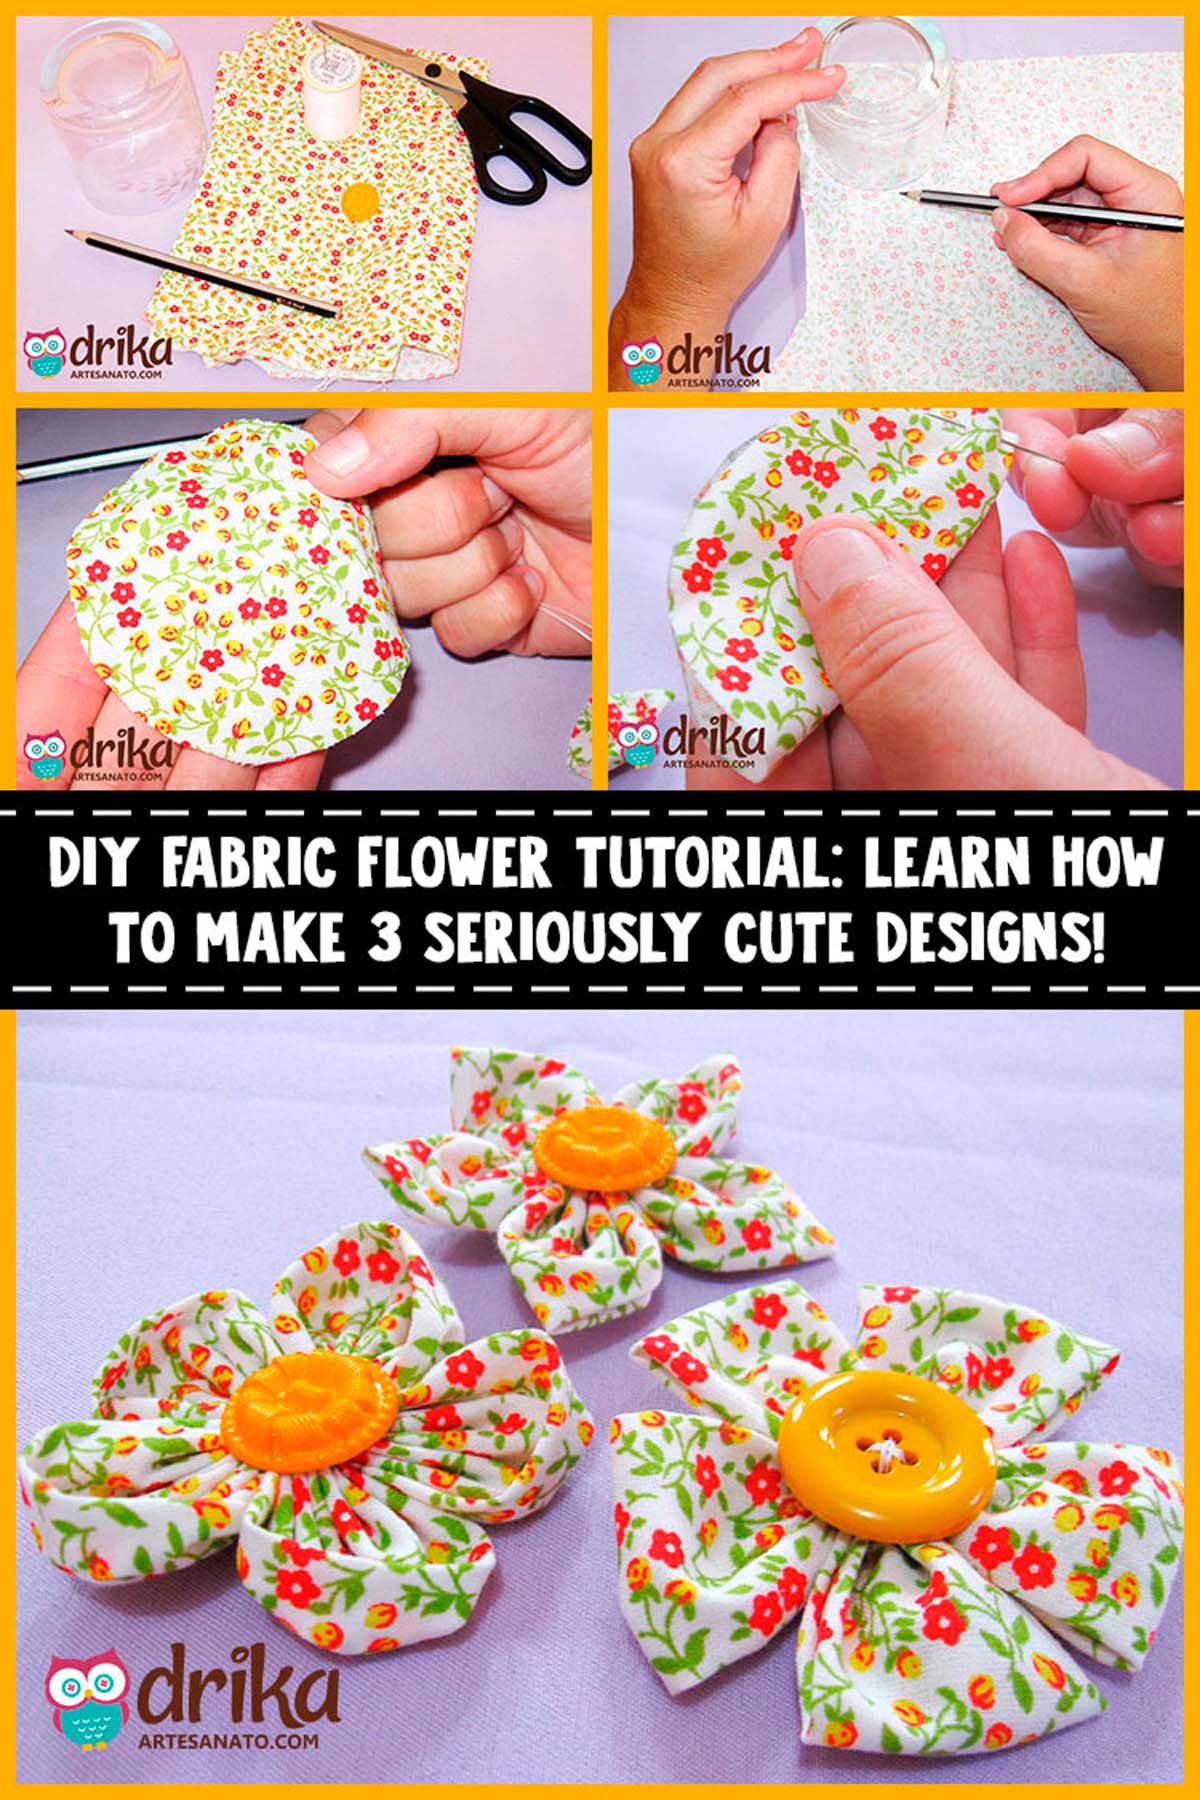
Ready to create unique and charming pieces with your own two hands? If your craft room is begging for a pop of color and a touch of sweetness, we’ve got the perfect solution.
In this tutorial, we’re diving into the world of fabric flowers, a simple, budget-friendly, and incredibly versatile craft.
Together, we’ll explore three distinct designs, each with its own charm and potential to transform your projects.
How about using your new fabric flowers to breathe new life into that forgotten accessory? Or maybe create a special, personalized gift for someone you love?
The possibilities are endless! You can do so much with these!
And to inspire your creativity even more, get ready to discover how straight petals can add a modern and surprising touch to your creations.
One of the designs we’ll teach you will show you how! Curious? Then stick with me and unleash the artist within you.
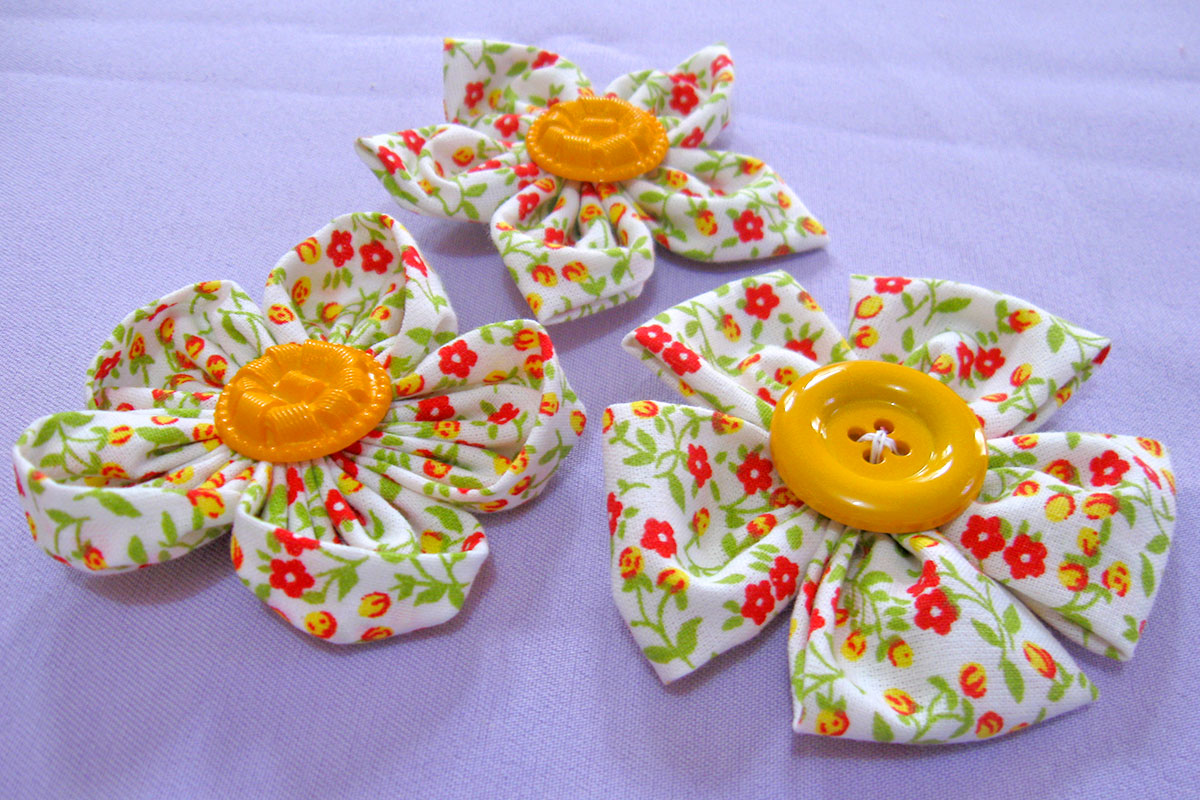
Get Inspired with These Ready-Made Fabric Flowers!
Already thinking about which fabric flower you’re going to make? They’re so versatile you can use them on everything! Pick your favorite fabric and let’s start creating!
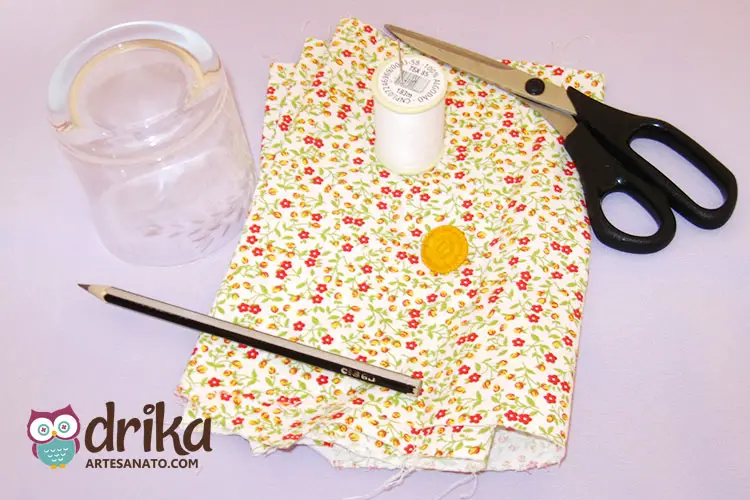
Material List to Make Your Fabric Flower:
- Scraps of patterned fabric for patchwork 100% cotton;
- #10 Kite Thread;
- Decorative Buttons;
- Circle Ruler or something circular you have at home;
- Hand Sewing Needle;
- Magic Fabric Erasable Pen;
- Magic Chalk or Marking Pencil;
- Sewing Scissors;
Preparing the Materials to Start Creating!
The beginning of all three fabric flowers is the same, so these first 4 steps will work for making all of them.
Let’s gather all the materials so nothing is missing and keep everything close at hand to make our work easier.
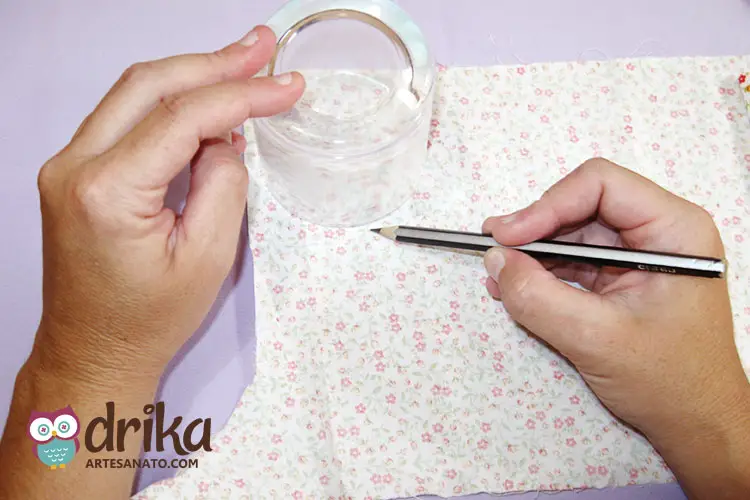
Tracing Circles on the Fabric with a Cup
Trace on the back of the chosen fabric using a cup, circle ruler, or something circular you have at home as a base.
The important thing is that the circle is perfect so our flower is perfect!
Cutting 5 Circles for Each Flower!
We’ll need 5 circles to make each of our fabric flowers.
If you want to make several flowers, you can cut all the circles at once to speed up the process.
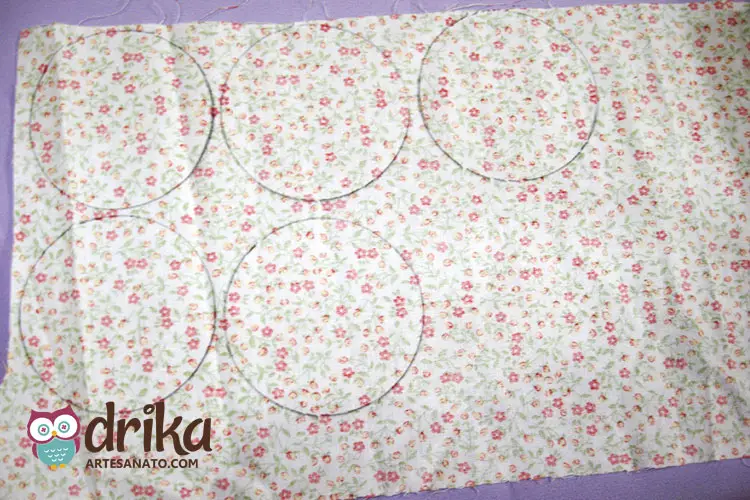
Cutting Out the Circles Carefully
Now just cut them all out. Up to here, these steps are common to all 3 flower designs. So, if you want to make all three designs, you can follow along with us!
Discovering the Fabric Flower with Pointed Petals
This is our first fabric flower; it has the pointed shape of the petals and is seriously cute.
It can be applied to clothes, bags, headbands, and a whole host of other uses.
Folding the Circle in Half to Form the Petal
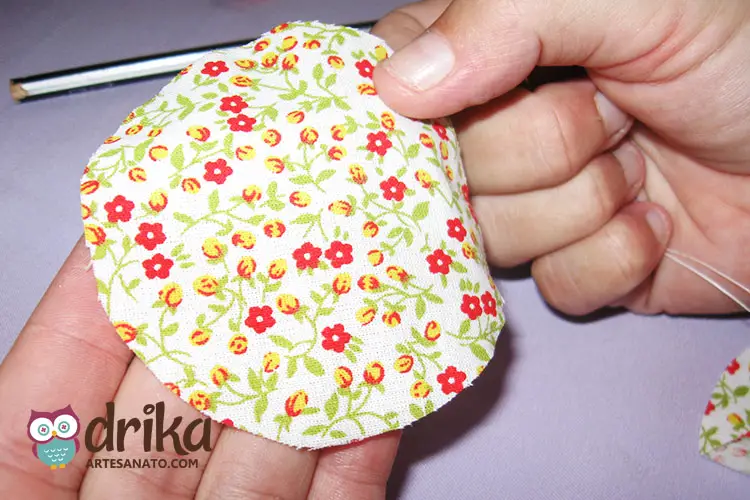
Let’s pick up where we left off… Take a circle of fabric and fold it in half. This fold is the first step in creating the petals of our flower.
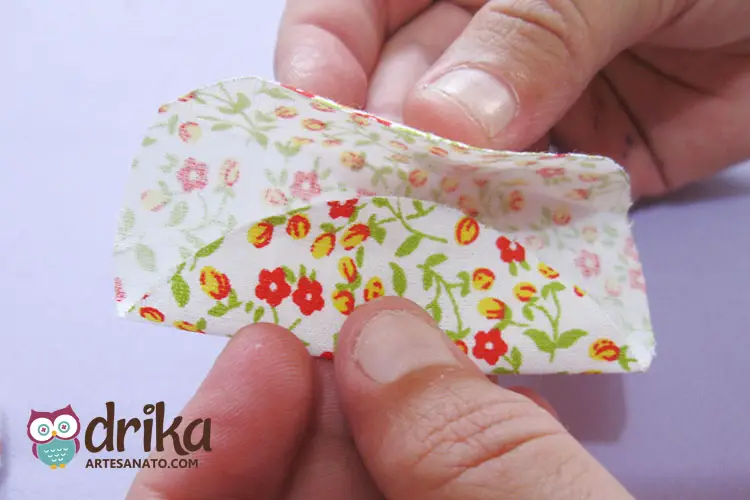
Folding in Half Again to Define the Tip of the Petal
Fold in half once more and you will have the shape below, that is, 1/4 of a circle. This fold will give the characteristic pointed shape to this flower.
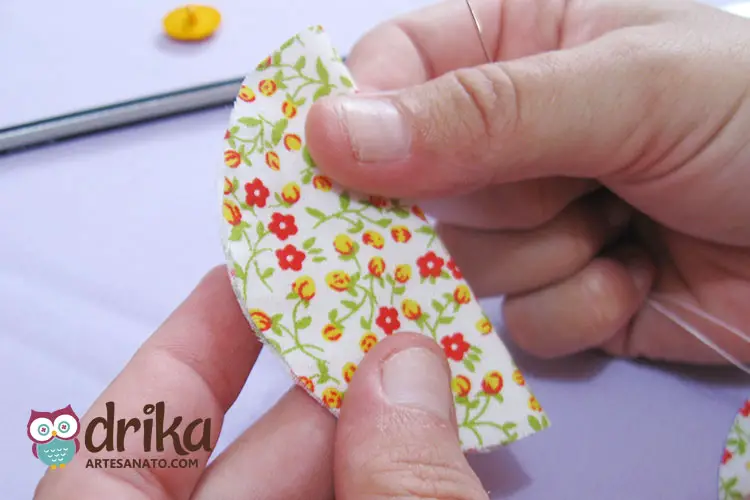
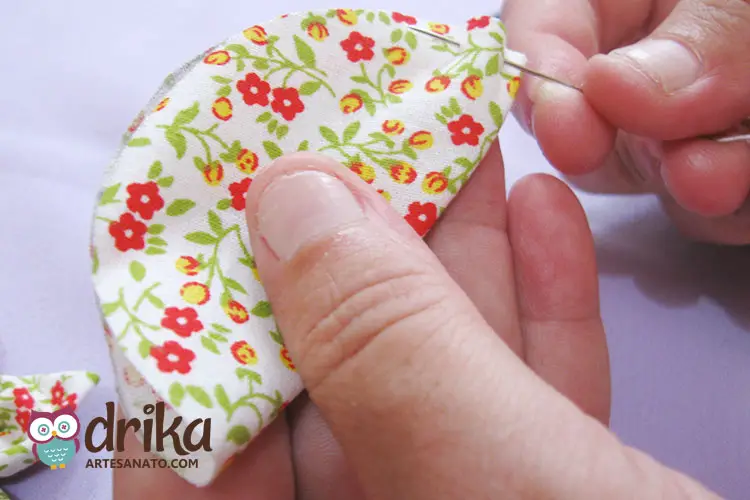
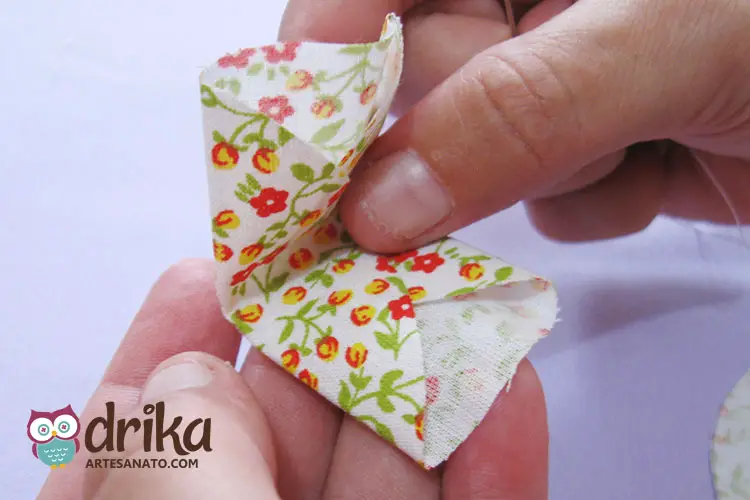
Basting the Petal with a Single Thread
You will only use 1 piece of thread; it will be the same from beginning to end. As in the image, do the basting stitch. The basting stitch should be done with small, regular stitches to ensure a good finish.
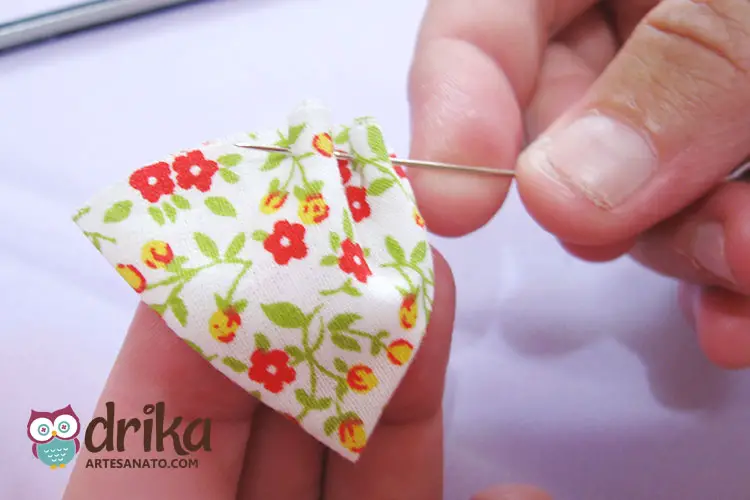
Passing the Needle Through the Entire Basting Stitch
Pass the needle through the entire basting stitch. Make sure the thread is well secured at the beginning and end of the basting stitch to prevent the petal from unraveling.
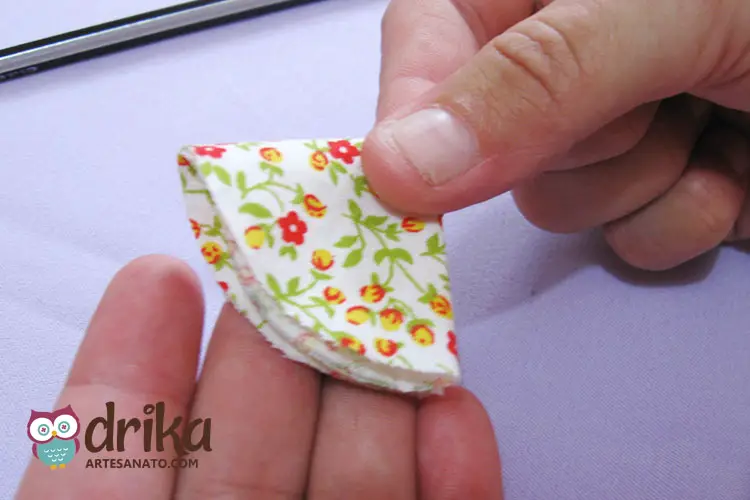
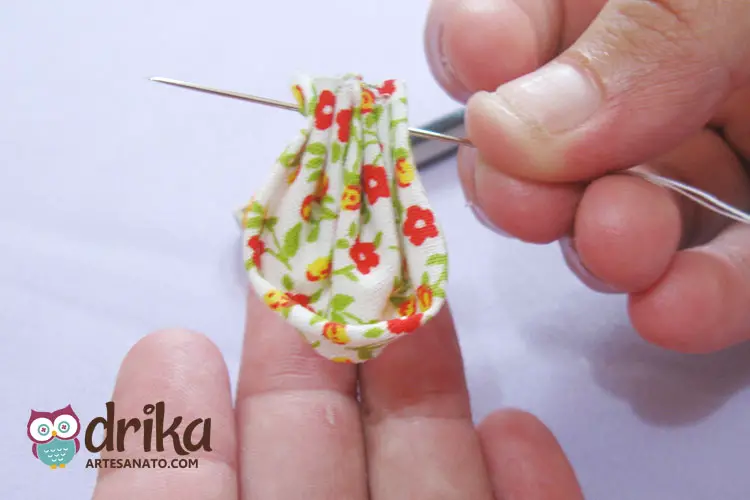
Admiring the First Pointed Petal of Our Flower
In the end, we will have the first petal of our fabric flower. Note that, with this way of folding, we will have a petal with a point or tip, as you prefer.
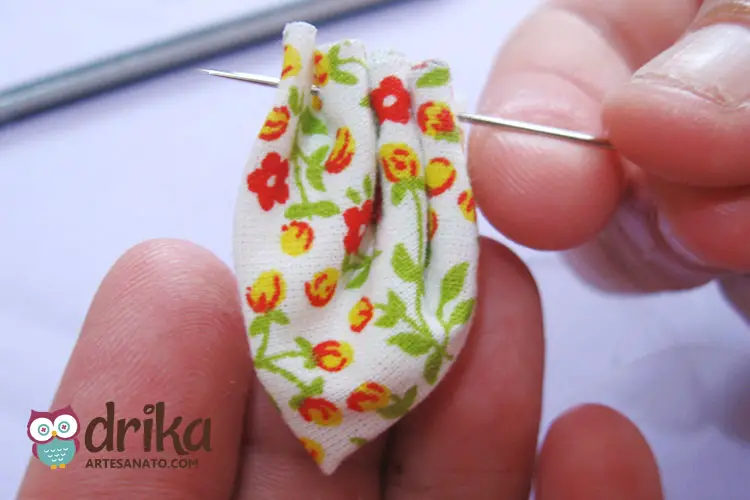
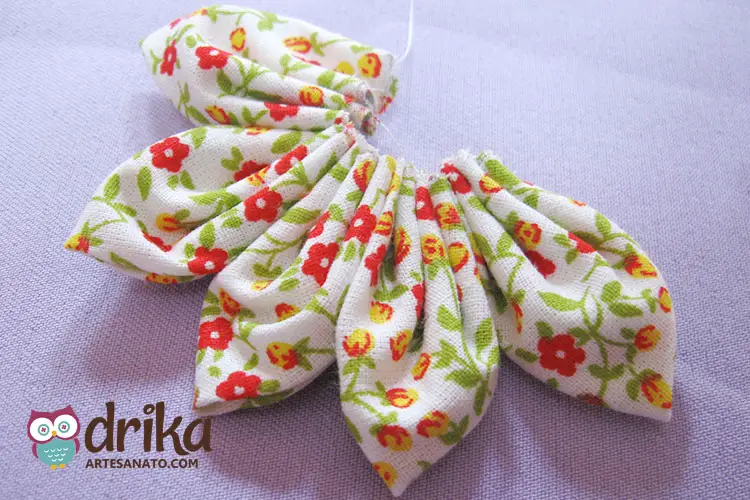
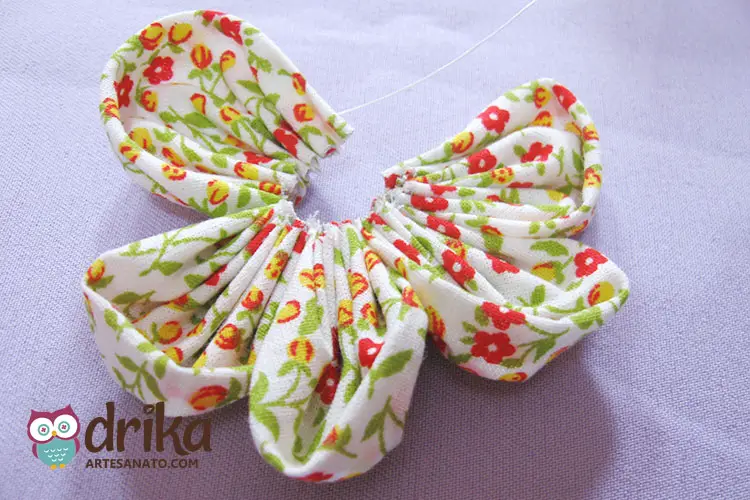
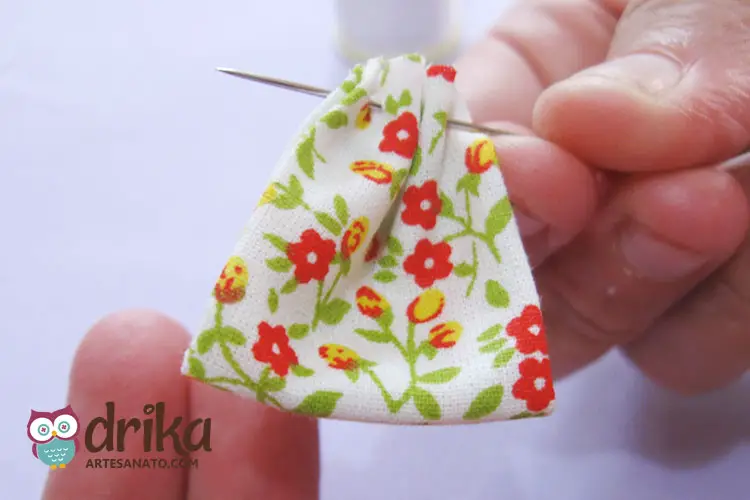
Joining the 5 Petals with the Same Thread
With the same thread, repeat the previous steps until you have 5 petals together. It’s important to keep the thread tension uniform so the petals are nice and close together.
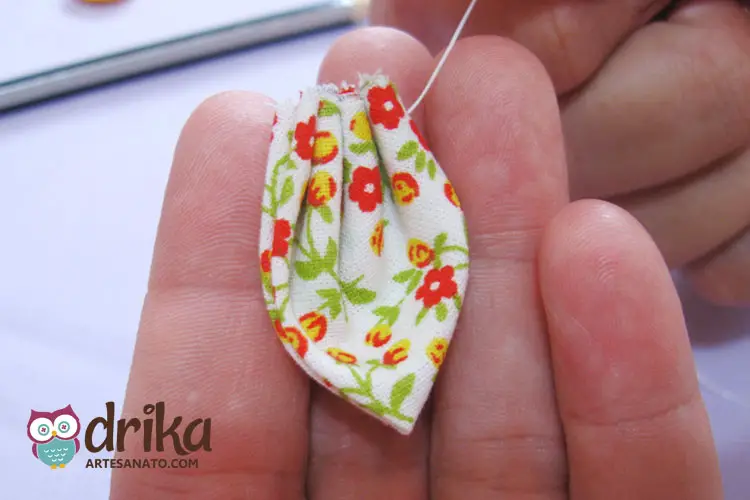
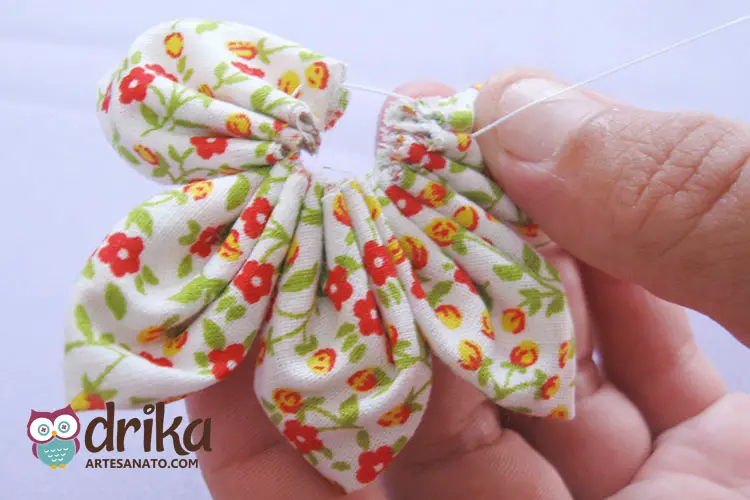
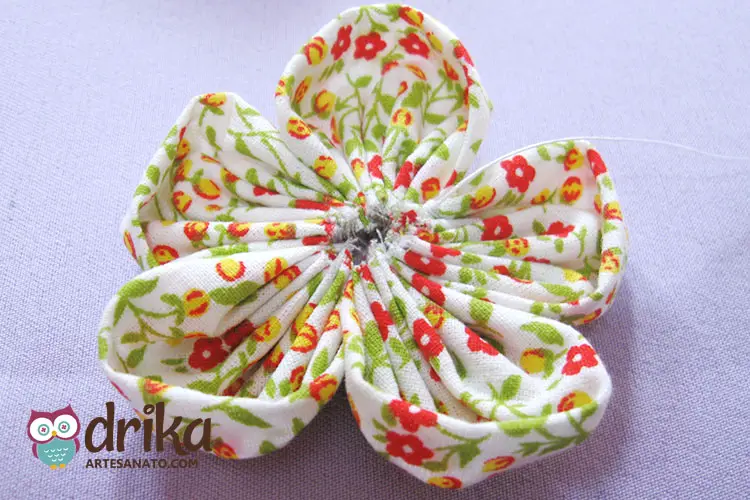
Closing the Flower and Securing It with Care
Let’s close the flower and secure it. Pull the thread carefully to bring all the petals together and form the center of the flower. Secure the thread with a tight knot to ensure the flower doesn’t unravel.
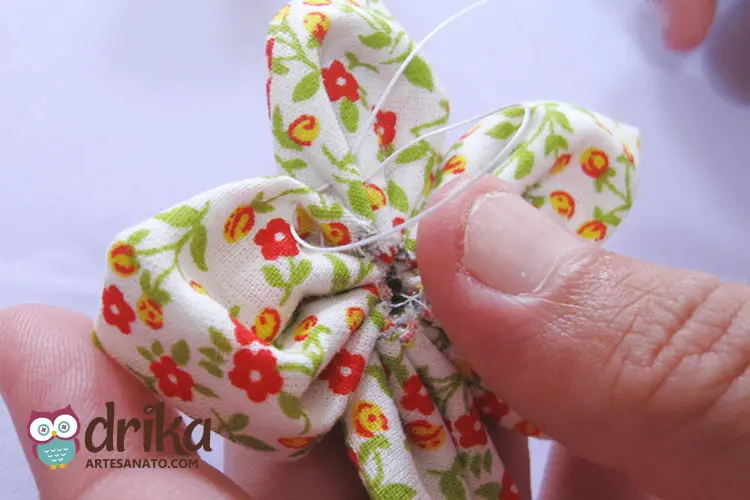
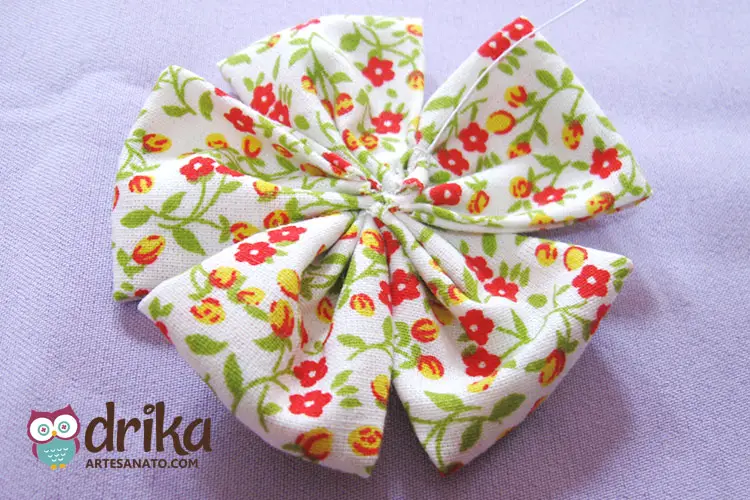
Almost Ready! Securing to Finish
Finish closing, secure, and you’ll have the flower almost ready. Now all that’s missing is the center to give the final touch to our flower.
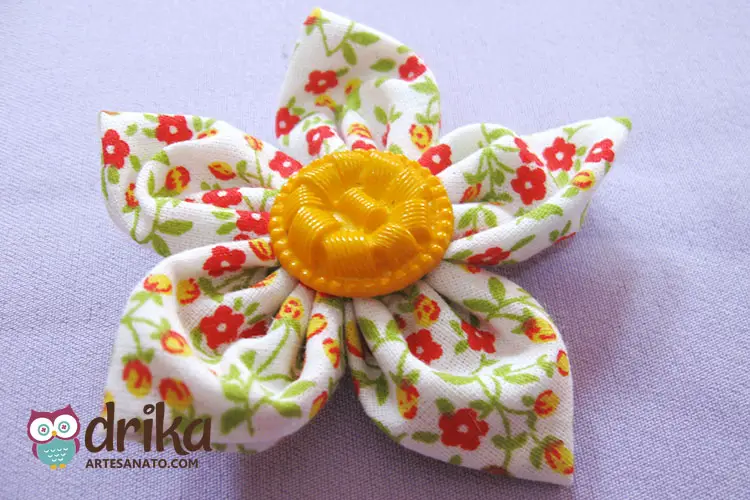
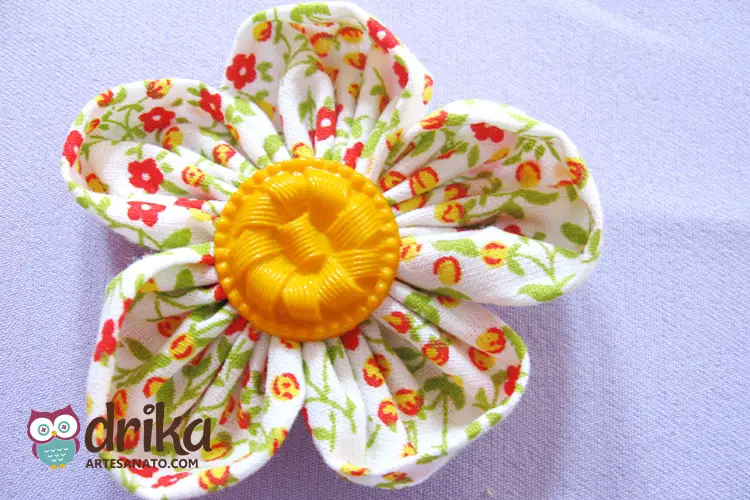
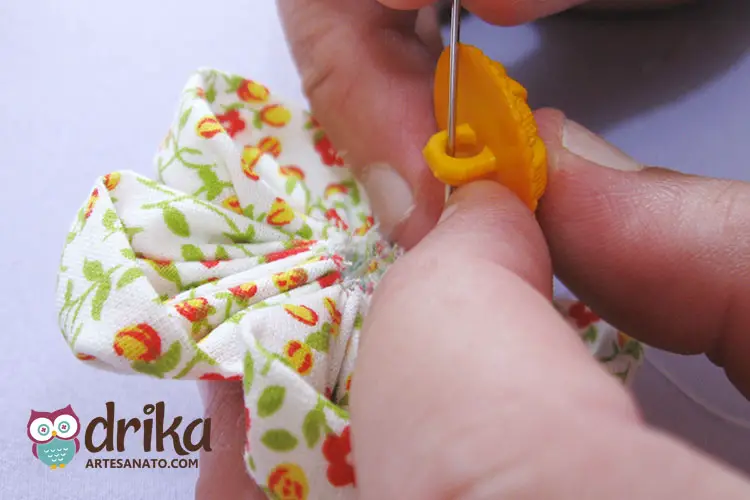
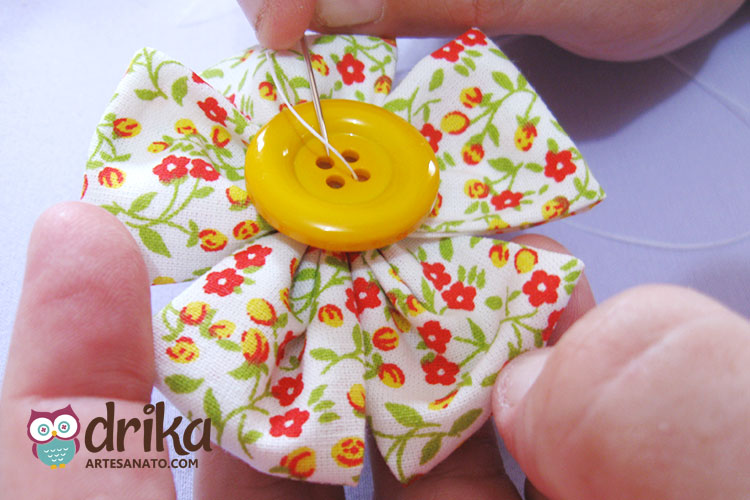
Finishing with a Charming Button in the Center
Here we will finish with the button that will be the center of our flower, always using the same thread. Choose a button that matches the flower’s fabric for an even more beautiful result.

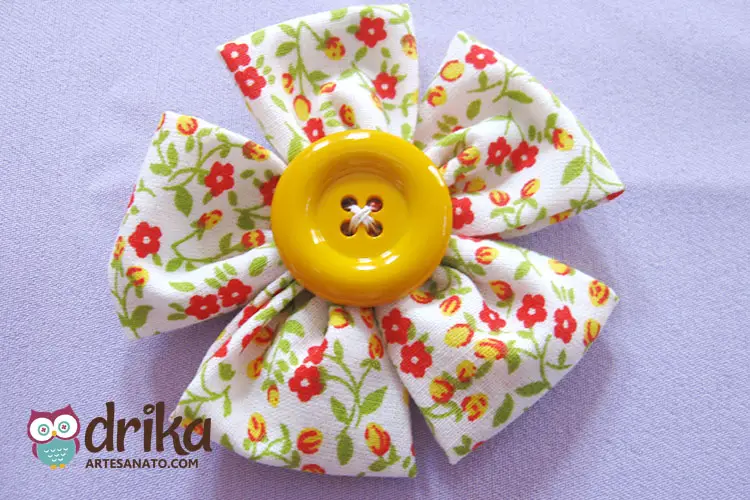
Ready! Our Finished Fabric Flower with Points
And our fabric flower with points is ready! How about making several in different colors and prints to use in your projects?
Discovering the Fabric Flower with Rounded Petals
In this fabric flower design, the shape of the petals will be rounded, which is so sweet. They can also be made into keychains, party favors, hair clips, and a ton more uses.
Folding the Circle in Half to Create the Rounded Petal
Here we will fold the circle only once in half and start basting. This simple fold already gives a very different effect to the petal.
Admiring the Rounded Shape of the Petal
See that here we will have a rounded petal. The basting stitch should be done on the edge of the petal, with small, regular stitches.
Joining the Petals and Securing Carefully
Join more petals until you have five, and let’s secure. Pull the thread carefully to bring all the petals together and form the center of the flower.
Almost There! Our Rounded Flower Taking Shape
Here we see the flower almost ready. You can already imagine how beautiful it will look with the center!
Sewing the Button to Give the Final Touch
Let’s sew the button. Choose a button that matches the fabric and that is proportional in size to the flower.
Finished! Our Rounded Fabric Flower Ready to Enchant!
And our rounded fabric flower is ready! This flower is perfect for those looking for a more delicate and romantic look.
Introducing the Fabric Flower with Straight Petals
This is our last fabric flower with the shape of straight petals, but no less delicate and charming.
It can be applied to cushions, wreaths, curtain tiebacks, and many other pieces to decorate your home.
Folding the Circle to Create the Square Shape
This time we will fold the circle twice, forming a “rectangle” as in the image below. This is the basis for creating the square shape of the petals.
Overlapping the Tips to Form the Base
One tip overlapping the other. This overlap is important to give structure to the petal and ensure it maintains its square shape.

Folding in Half to Define the Square
And then we will fold in half, forming a square. This final fold defines the shape of the petal and facilitates basting.
Basting the Square Petal with Care
Now we start basting. The basting stitch should be done on the edge of the petal, with small, regular stitches.
Joining the Square Petals and Securing
Joining other petals until we have five, and we secure. Pull the thread carefully to bring all the petals together and form the center of the flower.
Admiring the Square Shape of the Petals
With this way of folding, our fabric flower will have square petals. As seen below, here we changed the type of button used, but it is sewn with the same thread that you basted the petals.
Ready! Our Finished Fabric Flower with Straight Tips
And our third fabric flower with straight tips is ready! This flower is perfect for those looking for a more modern and geometric look.
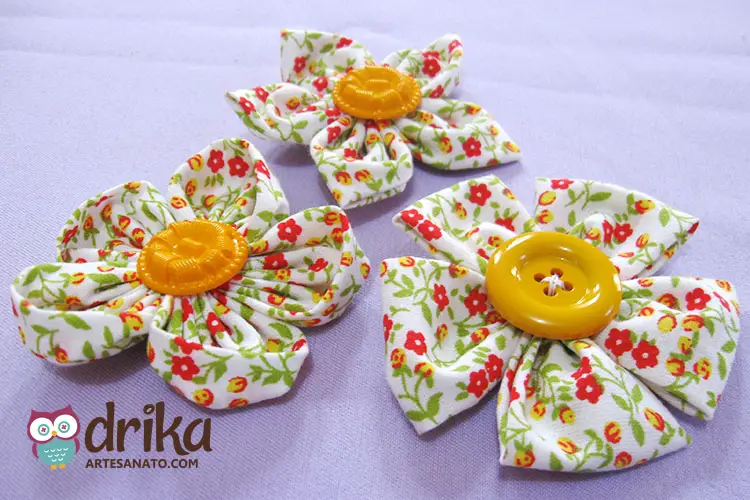
Our Three Fabric Flowers Ready to Inspire!
And here are the three designs we learned to make. Easy, right!? Now just choose your favorite and start creating!
Share This Idea and Inspire More People!
Loved this tutorial? Save it for later or share it on Pinterest to help us reach even further!
What did you think of our tutorials? They’re super easy to make, aren’t they? You can get creative with the colors and prints of the fabrics.
Check out our other articles with Craft Tutorials and make lots of pretty pieces to decorate your home, give as gifts, or sell.